Level Range: 3-5
Setting: The village Elder of Miregrove, Maera Windwhisper, has sent out a call for help. And Mayor Hugo, the mayor of Spiritholm Island, asks the adventurers to investigate and render whatever aid may be needed to the villagers.
And Mayor Hugo has authorized deadly force if necessary…

Adventure Background:
Strange occurrences have been happening in Miregrove. Farmers have reported livestock drained of blood, villagers are falling ill with strange symptoms, and eerie, pale figures have been spotted near the outskirts of the village at dusk. Mayor Hugo suspects that a vampire or vampire-like creature has made its home somewhere on the island, disturbing the elemental balance and threatening the safety of the people.
The Fear in Miregrove:
The people of Miregrove have always lived with the dangers of the swamp—quickmud, dangerous wildlife, and sudden floods. But the fear gripping them now is different. It’s a creeping terror, something unnatural. The villagers are plagued by bad dreams, waking in cold sweats with the sensation of being watched. Livestock has been found drained of blood, and several people have disappeared entirely, leaving only scattered belongings behind.
Every night, the mist thickens, and the fear deepens. The villagers have noticed pale figures moving through the fog, always just out of sight, but close enough to feel their presence. Some of the villagers have returned from the marshes pale and sickly, complaining of strange nightmares and an unshakable sense of dread. The bite marks on their necks tell the rest of the story—though they try to hide them, rumors of a vampire have spread throughout the village.
The shamans have been no help, claiming that the spirits of the marsh are silent and unwilling to intervene. Without their protection, the villagers feel utterly exposed. They’ve started locking their doors at sunset, hanging bundles of garlic and protective charms over their windows, but they know it won’t be enough.
The village elder, Maera Windwhisper, an old shaman, has sent word to nearby towns and villages seeking adventurers who can track down and eliminate the vampire. With the spirits of the marsh silent and the vampire threat growing stronger each night, Maera knows time is running out. She offers a magical protection and rare herbs to those who are brave enough to investigate and save Miregrove from falling entirely into darkness.

Maera Windwhisper‘s Offer to Adventurers
Meara Windwhisper, as a sign of gratitude for the adventurers’ help, brews a special Potion of Vital Renewal for each of them. Unlike a typical healing potion, this elixir is crafted using ancient natural ingredients sourced from the deepest parts of the Verminwood Marshes and infused with the power of the elemental spirits Maera communes with.
The potion is stored in a small, hand-carved wooden vial, adorned with vines and leaves etched into its surface. A faint, greenish glow emanates from the liquid inside, swirling with life essence. The aroma is earthy and soothing, reminiscent of freshly bloomed flowers after a rainstorm.
Effects:
- Healing:
Upon drinking the Potion of Vital Renewal, the adventurer regains 2d6+4 hit points as the healing energy restores their vitality. The potion’s effects are gentle yet potent, knitting together wounds and revitalizing the drinker’s energy. - Nature’s Blessing:
In addition to healing, the potion grants the adventurer advantage on Constitution saving throws for the next hour. This boon represents Maera’s deep connection to nature and its protective forces, shielding the adventurers from harmful effects and toxins. - Lingering Vitality:
For the next 1d4 hours, the adventurer has a faint regeneration effect, regaining 1 hit point every 10 minutes, up to a total of 10 additional hit points. This slow, steady healing ensures the adventurers have lasting protection as they continue their journey.

Key Locations in Miregrove:
The raised wooden walkways that connect the homes and buildings of the village are now silent and mostly empty after sunset. Normally, the villagers would be out collecting water from the marsh or gathering herbs, but since the disappearances, the walkways have become a place of dread. Children are kept inside, and adults only venture out in groups. At night, strange footprints appear in the mud below, and the sound of slow, deliberate footsteps can be heard echoing through the fog-covered village. No one knows what’s watching them from the shadows, but all know that something is out there.

The Shaman’s Circle:
A sacred circle of stone pillars near the village center, where the village shamans once communed with the spirits of the marsh. Now, the pillars are covered in strange, dark moss that the shamans claim wasn’t there before. The circle has become a place of unease; villagers report hearing whispers in the mist, and offerings left to the spirits go untouched. The once protective spirits of the marsh seem to have abandoned the village, leaving its people vulnerable.

The Sunken Docks:
The village docks are half-submerged in the swamp’s murky water, and a thick fog rolls in every evening, making the area particularly dangerous. In recent weeks, several villagers have vanished while fishing or ferrying supplies. Some claim to have seen a dark figure gliding across the water’s surface, and the sound of splashing in the dead of night echoes across the village. Boats are found adrift, empty, with only faint claw marks left on the sides.

The Swampbrew Tavern:
The tavern is one of the few places where the villagers still gather, though it’s a somber affair now. The building itself is small and wooden, sagging slightly under the weight of the swamp’s humidity. Yora, the tavern keeper, used to serve her famous spiced swampbrew to the locals, but now she spends most of her time listening to the whispered fears of her patrons. Every night, the villagers huddle inside, telling stories of people disappearing in the marsh or waking up with mysterious bite marks. Fear keeps them from venturing outside after dark, and many refuse to speak of what they’ve seen in the mist.
But, everyone whispers the same set of words.
Castle Dreadthorn…

The Herbalist’s Shack:
A small, crooked building on the outskirts of the village, where Old Fenrick, the village’s herbalist, lives and works. Fenrick is one of the few in the village who hasn’t succumbed to the fear, but even he knows something dark is at play. His shop is cluttered with strange herbs, jars of swamp creatures, and protective talismans. Lately, Fenrick has been making more talismans than ever, handing them out to anyone who will take them. “Something wicked’s come outta the marsh,” he says, warning anyone who will listen. He’s seen dark shapes moving in the fog, and he’s certain something is stalking the villagers.
For any adventures will to help the village, Old Fenrick has a few potions he is willing to sell, at a discount, to help the cause of course. These are:
- (1) Levitation potion, 250 GP.
- (2) Extra healing, potion, 500 GP.
- (1) Undead control, 2,000 GP.


Hey, If you are in need of vintage Dungeons and Dragons goodness, check out our friends at DEIGames; an independent seller of the greatest games on Earth. Support your booksellers!
Backstory of Castle Dreadthorn
Long ago, Castle Dreadthorn was not the forsaken, crumbling ruin it is today, but a grand fortress, built by a powerful noble family known as the Dreadthorns. The castle was originally constructed as a symbol of strength and dominance over the lands surrounding the Verminwood Marshes. At that time, the swamp was less treacherous, with only occasional pockets of danger. The Dreadthorn family chose this location specifically for its natural defenses—the thick marshlands provided an almost impenetrable barrier to would-be invaders.
The Dreadthorns were rumored to have secret dealings with dark forces, dabbling in necromancy and forbidden magic. Their wealth and influence spread far and wide, and for a time, the castle was a bustling seat of power. It was built with towering stone spires, gothic architecture, and hidden catacombs deep within the earth. The people of the nearby villages respected and feared the Dreadthorn family, often speaking in hushed tones of the strange happenings and unnatural events that surrounded the family.

The Fall of Castle Dreadthorn:
As Vladimir Dreadthorn’s influence spread, his cruelty and hunger for power grew insatiable. He began to turn on his own allies within the vampire coven, seizing more and more power for himself. This betrayal led to infighting among the vampires, weakening their stronghold.
At the same time, the swamp seemed to respond to the castle’s corruption. The Verminwood Marshes became even more treacherous, as if nature itself sought to reclaim the land from the dark forces that had taken root there. The once-grand castle began to fall into disrepair as the swamp overtook its foundations. The stone walls crumbled, spires collapsed, and the once-beautiful halls were left in ruin, covered in moss and consumed by the marsh’s relentless overgrowth.
In the end, Vladimir’s dark reign was brought to a halt by a group of powerful adventurers who managed to infiltrate the castle and destroy the coven’s heart—an ancient artifact that granted the vampires their eternal life. Though Vladimir Dreadthorn was not completely destroyed, his power was severely diminished, and the castle was abandoned by what remained of the vampire coven.
Or, so everyone thought…

Maera Windwhisper’s Map of the Verminwood Marshes
Maera Windwhisper’s map is an old, weathered piece of parchment, its edges worn and slightly tattered from years of use. The map is hand-drawn, with intricate details that reflect Maera’s deep knowledge of the Verminwood Marshes. The ink is faded in some places but still legible, and the map is covered in small, handwritten notes and symbols that mark important locations, dangers, and safe routes through the treacherous swamp.
Maera warns the adventures, “You must stay on the path…”

Verminwood Marshes:
The Verminwood Marshes are a vast, eerie expanse of murky waters, twisted trees, and creeping mist that blankets the area, making visibility difficult beyond a few dozen feet. The marshes are named for the abundance of dangerous creatures that lurk within, as well as the twisted, vermin-infested flora that seems to grow unnaturally in the stagnant, brackish water.
The Atmosphere:
The air is humid and filled with the smell of rot and mildew. Even during the day, the light is dim, filtered through a constant canopy of thick fog. At night, the marshes become truly dangerous, with glowing eyes visible in the darkness and strange, unearthly sounds echoing through the trees. The marsh is alive with the constant croaking of frogs, the rustling of unseen creatures, and the occasional splash of something large moving in the water.
The Landscape:
The terrain is a mix of shallow, murky pools, spongy ground, and towering trees with twisted, gnarled roots that rise out of the water like skeletal fingers. The trees are covered in a thick layer of moss and lichen, their branches tangled with creeping vines that sway unnaturally even when there is no wind. In some areas, the ground seems solid but can suddenly give way to quicksand-like mud or hidden sinkholes. Paths through the marsh are treacherous and often obscured by the ever-present fog that clings to the water’s surface.
The Waters:
The stagnant water of the marshes is dark and thick with decay. Swarms of insects constantly buzz above the surface, and the water itself is home to dangerous predators like leech swarms and giant serpents. The deeper areas of the marsh are rumored to hold ancient, submerged ruins, though few dare venture that far.

Threats Within the Verminwood Marshes:
Fog and Illusions: The natural fog in the Verminwood Marshes seems to have magical properties. Characters can easily become disoriented, and magical illusions (either from creatures or the marsh itself) make it easy to lose one’s way or become separated from the group.
Environmental Hazards:
Quicksand and Sinkholes: Unstable ground and hidden pits can catch travelers unaware. Characters who fail a Dexterity or Survival check could find themselves stuck, requiring assistance to escape before they sink further.
Insect Swarms: Large swarms of biting insects are common in the marshes, and while not deadly on their own, they can harass and distract adventurers, causing exhaustion and making it harder to concentrate on tasks.
Toxic Plants: Some of the vegetation in the marsh is poisonous or parasitic. Poisonous reeds and thorny bushes can cause rashes, while parasitic plants like Blightvine can drain the life force of anyone who touches them.

Random Monster Encounters:
There is a 20% chance of an encounter with a random creature each day as the adventurers move through the marsh.
- 1. Ghosts (1 -3):
Ethereal creatures born from the souls of those who drowned in the marsh. These spectral entities haunt the marshes, appearing as shifting shadows within the mist. They drain the life force of their victims with a chilling touch.
Abilities: Life Drain, Incorporeal Movement, and Stealth in misty environments. - 2. Giant Leeches (1):
Massive, bloodsucking creatures that thrive in the stagnant waters of the marsh. They attack anything that enters the water and latch on, draining their victim’s blood and sapping their strength.
Abilities: Blood Drain (continuous damage over time until removed) and Amphibious Movement. - 3. Bog Hags (1-2):
Twisted, swamp-dwelling witches that use dark magic to lure travelers deeper into the marsh. They often appear as old, kindly women offering aid, only to curse or consume those foolish enough to trust them.
Abilities: Spellcasting (Illusions, Curses), Claw Attacks, and Create Swamp Minions. - 4. Venomfang Serpents (1-2):
Large, snake-like creatures with venomous bites. They hide in the tall reeds and strike with blinding speed, often paralyzing their prey before dragging them into the water to drown.
Abilities: Poison Bite (paralyzing venom) and Constrict. - 5. Swamp Elementals (1):
These creatures are embodiments of the marsh itself, formed from mud, water, and rotting vegetation. They move slowly but are incredibly strong and can overwhelm adventurers with waves of sludge and swamp water.
Abilities: Slam Attack, Mud Spray (blinds and slows enemies), and Swamp Movement (moves through difficult terrain without penalty). - 6. Giant Toads (1-5):
These oversized amphibians lie in wait, blending in with the marsh. They can swallow adventurers whole, trapping them inside until they manage to escape or are digested.
Abilities: Swallow (requires a Strength check to escape) and Leap Attack. - 7. Crocfiends (1-4):
Giant, mutated crocodiles that have been corrupted by the dark magic of the marsh. Their hide is nearly impenetrable, and their jaws can crush even the toughest armor.
Abilities: Crushing Bite, Death Roll, and Thick Hide (resistance to non-magical attacks). Hides are worth 100 GP each. - 8. Will-o’-Wisps (1-2):
These eerie lights float above the water, luring travelers deeper into the marsh where they become lost or fall victim to the marsh’s many predators. Will-o’-wisps often work in concert.

NPC: Garrick Stonehart
As the adventurers mumble their way through the marsh they come across something unexpected, a man fighting for his life. Will they help?
Class: Fighter (Level 3)
Race: Human
Alignment: Neutral Good
Armor Class: 5 (Chain Mail)
Hit Points: 30
Speed: 30 ft.
Weapon: Longsword (1d8+3 slashing), Shield
Background:
Garrick Stonehart is a tough, no-nonsense fighter who hails from a small village on the outskirts of a major kingdom. He’s a natural leader with a strong sense of duty and loyalty, particularly to his comrades. Garrick is part of an adventuring group hired to investigate reports of strange activity in the Verminwood Marshes, but things went horribly wrong when they encountered a swarm of monstrous creatures, including the dreaded giant leeches. Separated from his comrades during the ambush, Garrick is now fighting for his life.

Giant Leech
The Giant Leech is a monstrous, slimy creature that thrives in the dark, stagnant waters of the Verminwood Marshes. Unlike its smaller cousins, the giant leech is a terrifying predator, capable of overpowering and draining the life force from even the most experienced adventurers. Its appearance and behavior strike fear into those who dare venture too close to its swampy lair.
Armor Class (AC): 9 (Natural Armor)
Hit Points (HP): 32 (4d8 )
Speed: 10 ft., swim 30 ft.
Abilities:
- Blood Drain:
Once the Giant Leech successfully bites its target, it deals continuous damage each round by draining blood. The longer it remains attached, the weaker the victim becomes. - Stealth and Camouflage:
The Giant Leech can hide in shallow waters and swampy terrain with ease. It gains advantage on Stealth checks in water or marsh environments. - Engulf:
If the leech manages to weaken its prey sufficiently, it can attempt to engulf them, dragging the victim underwater and suffocating them. This ability is especially dangerous in the marsh, where adventurers can be pulled into quicksand or deeper waters by the leech’s powerful body.
Garrick’s Introduction:
“Thank you for your help. I didn’t think I’d make it out of that swamp alive.“
He wipes the slime from his face and gives a grim smile, his eyes still darting around the marsh, wary of further danger.
“I’m Garrick Stonehart, part of a group sent here to investigate strange happenings. But the marsh… it’s more dangerous than we expected. My comrades… they’re still out there, probably in just as much trouble as I was. If you’re heading towards the castle, I know the way. And, we can link up with my friends to take on this threat.”
Offer to Lead the Party:
If the party agrees, Garrick offers to lead them back to the spot where his group was ambushed outside of the castle. He knows the terrain and the danger but is determined to rescue his comrades, even if it means putting himself at risk again.

Arrival at Castle Dreadthorn: A Scene of Foreboding
The adventurers approach Castle Dreadthorn as the sun begins to set, casting a deep, red glow over the horizon. The Verminwood Marshes stretch out around them, a sprawling swamp filled with mist and the haunting cries of distant creatures. The castle looms in the distance, its dark spires piercing the sky like jagged teeth, the silhouette of its imposing walls barely visible through the swirling fog that clings to the landscape.
As the party draws closer, the air grows colder, more oppressive. A heavy, unnatural silence falls over the land, broken only by the occasional croak of a distant marsh creature or the squelching sound of their boots sinking into the wet, mossy ground. The mist thickens, making it difficult to see more than a few feet ahead, but through the haze, Castle Dreadthorn emerges like a dark specter, towering over the surrounding swampland.
The castle is an imposing structure of blackened stone, with high, crumbling walls and gothic spires that seem to reach toward the heavens. Vines and ivy cling to the ancient stonework, though the plants are sickly and twisted, as if poisoned by the dark magic that radiates from within the castle. The entrance is guarded by an iron portcullis, rusted with age, but still intact, and above it, a massive stone gargoyle perches, its glowing eyes watching the adventurers approach with an eerie, lifeless gaze.
As the adventurers lie in wait, deciding what to do they observe winged humanoids flying from the castle tower. Gargoyles are on their night hunt.
The wind howls through the marsh, carrying with it a faint whisper, as if the castle itself is alive, beckoning them to enter—or warning them to stay away.

Entering Castle Dreadthorn
Author Note: There are three possible ways to enter the castle. The adventurers will need to scout out their options. And, make their best option.
1. The Front Gate (Direct Approach)
The most obvious and direct way into the castle is through the front gate. The gate is guarded by a squad of Kobold Guards.
Squad of Kobold Guards at the Front Gate of Castle Dreadthorn
These kobold guards are fiercely loyal to Vladimir Dreadthorn and have been tasked with guarding the Abyssal Warden, the enchanted door of Castle Dreadthorn. The squad is well-trained in defensive tactics, utilizing both traps and surprise attacks to overpower intruders. Though small and physically weaker than other creatures, the kobolds rely on their numbers, cunning, and traps to protect the castle’s entrance.
Where there is one kobold, there is bound to be more…
Kobold Guards (4)
- Hit Points: 4,4,3,2
- Armor Class: 7 (Leather armor, Shield)
- Damages: Short swords (1d6)
- Treasure: 25 SP and 30 CP among the four.
- Note: If attacked the Kobolds will sound the alarm, if given enough time, alerting the castle of the attack.

2. The Secret Passage (Stealth Approach)
Description:
Hidden deep in the Verminwood Marshes, there is an ancient secret passage known only to a select few. This passage, overgrown with vines and covered by the shifting mist, was once used by the servants of Vladimir Dreadthorn to move in and out of the castle undetected. The entrance is concealed behind a large, twisted tree on the outskirts of the castle grounds, leading underground into the castle’s lower levels. If the party searches the area, they will find the tunnel entrance leading to the Dungeon Basement Level. This is unguarded and is an oversight by the Kobold guards.

3. The Collapsed Wall (Cunning Entry)
Description:
On the far side of the castle, partially hidden by the mist and vegetation of the Verminwood Marshes, is a section of the outer wall that has collapsed. Over time, erosion and neglect have weakened the castle’s defenses, creating a breach large enough for adventurers to slip through. However, the rubble-strewn hole leads into a crumbling section of the castle, which is unstable and largely abandoned. This leads the adventurers into the Main Level of the castle allowing them to enter into an older unused portion of the castle.

Dungeon Level of Castle Dreadthorn: Kobold Barracks and Prison Cells
The dungeon level beneath Castle Dreadthorn is a dark, damp, and foreboding place, where the castle’s prisoners are held and the Frostscale Kobolds serve as the primary guards. This level of the castle is a labyrinth of cold stone corridors, iron-barred cells, and low, cramped rooms where the kobolds sleep, eat, and prepare for patrols. The entire dungeon smells of mildew and decay, and the constant sound of dripping water echoes through the halls.

Here are six key rooms that can be found in this dungeon level:
D1. Prison Cells
- Description:
A long, narrow hallway lined with iron-barred prison cells on either side. The stone walls are damp, with water slowly trickling down the moss-covered surfaces. Torches flicker dimly, casting eerie shadows that dance along the corridor. Inside the cells, several prisoners are chained to the walls, some injured or malnourished from their time in captivity. The air is thick with the stench of mold and fear. - Details:
The iron bars are rusted but strong, and each cell has a small, barred window leading to a ventilation shaft. In some cells, adventurers may find remnants of old, rotting straw beds or long-forgotten bones of previous prisoners. The kobolds regularly patrol this hallway to ensure no escape attempts are made. - There are three prisoners here and they were part of Garrick Stonehart party of adventurers. They will need weapons and armor, but otherwise they are willing to help. They are:
1. Selene Moonshadow (Half-Elven Rogue)
- Race: Half-Elf
- Class: Thief
- Armor Class: 9 (clothing only)
- Hit Points: 32
- Level: 5
Background: Selene is a cunning thief with a knack for magic and a sharp wit. Now trapped in the dungeon, she is biding her time, waiting for the right moment to make her escape. Or, to be sacrificed.
Selene will keep secret she has applied to the feared Assassins Guild, and just needs a few more kills to make the cut. If she has to kill vampires great, but others will work also.

2. Thrain Ironfist (Dwarven Fighter)
- Race: Mountain Dwarf
- Class: Fighter (Champion)
- Armor Class: 9 (Clothing only)
- Hit Points: 56
- Level: 5
Background: Thrain Ironfist is a seasoned warrior and mercenary, known for his prowess in battle and unshakable loyalty. He was hired by a local village to protect them from the growing vampire threat, but during a raid on Castle Dreadthorn, he was captured and imprisoned in the dungeons. Despite his gruff demeanor, Thrain is loyal to his comrades and refuses to break under torture.
He longs to get back to his home island of Dunharrow Deep to see his family.

1. Elysia Brightstar (Elven Paladin)
- Race: High Elf
- Class: Paladin (Oath of Devotion)
- Armor Class: 9 (Clothing)
- Hit Points: 42
- Level: 5
Background: Elysia is a noble paladin of the Order of the Silver Light, known for her unyielding courage and devotion to the forces of good. She led a group of adventurers into Castle Dreadthorn to rid Spiritholm of the vampire threat but was captured when her party was overwhelmed by Dreadthorn’s ghouls. She now languishes in the dungeon, her strength sapped by the vampire’s draining magic, but her spirit remains unbroken.

D2. Torture Chamber
- Description:
This room is where the most unfortunate prisoners are taken to be “interrogated.” The chamber is dominated by a large wooden table with leather straps used to restrain captives. Iron hooks, chains, and cruel-looking implements hang from the walls, most of them stained with old, dried blood. A brazier in the corner provides dim light, and the flicker of the flames casts twisted shadows on the walls. - Details:
The torture devices are still in use, mostly by the kobold guards, though they lack the finesse of their vampiric masters. The floor is uneven, with cracks where the blood of countless prisoners has seeped through. In one corner, a small drainage grate occasionally gurgles as something unseen moves in the sewer below.
D3. Kobold Barracks
- Description:
A low-ceilinged room where the Frostscale Kobolds sleep and rest between patrols. The floor is strewn with straw bedding, old blankets, and small piles of stolen goods that the kobolds hoard as trophies. The walls are carved with crude markings—likely kobold-made graffiti—and there’s a rancid smell of spoiled food in the air. - Details:
The room is poorly lit by a single, smoky torch, casting dim light over the squalid conditions. There are old, chipped weapons scattered about, mostly spears, daggers, and makeshift clubs. A small fire pit in the center provides warmth, but the kobolds don’t seem to care about the smoke that fills the room. The guards here are often caught napping, making this an opportunity for stealthy adventurers.
Kobold Guards in the Barracks (15 Total):
1. Kobold Sergeant
- Role: The kobold sergeant is the leader of this small force, barking orders to keep the guards in line. He carries a slightly better-made short sword and has a worn leather cloak signifying his rank.
- Armor Class: 6 (Leather Armor, Shield)
- Hit Points: 15
- Weapons:
- Short Sword: 1d6 piercing damage.
- Spear (Melee or Ranged): 1d6 piercing damage.
2. Kobold Trap Specialist
- Role: This kobold is responsible for setting up traps around the barracks and entrance to the castle. He is smaller than the others and always carries a pouch of tools to rig up various traps.
- Armor Class: 7 (Leather Armor)
- Hit Points: 9
- Weapons:
- Sling: 1d4 bludgeoning damage.
- Dagger: 1d4 piercing damage.
3-7. Kobold Spearmen (5 Guards)
- Role: These kobolds wield spears and form the backbone of the squad’s defense. They are trained to work together in small groups, relying on their numbers to overwhelm intruders.
- Armor Class: 13 (Leather Armor)
- Hit Points: 8
- Weapons:
- Spear (Melee or Ranged): 1d6 piercing damage.
8-12. Kobold Swordfighters (5 Guards)
- Role: These kobolds are armed with short swords and are slightly more aggressive than their spear-wielding companions. They are quick to strike and use hit-and-run tactics.
- Armor Class: 7 (Leather Armor)
- Hit Points: 7
- Weapons:
- Short Sword: 1d6 piercing damage.
13-15. Kobold Archers (3 Guards)
- Role: These kobolds are armed with short bows and will attack from a distance leaving the knife work to their friends.
- Armor Class: 7 (Leather Armor)
- Hit Points: 7
- Weapons:
- Short bows: 1d4 piercing damage.

Collective Kobold Treasure:
If the adventurers take some time, the Kobolds have a small kitty of coins and other goods they use for trading and gambling purposes..
Coins and Gems:
- Gold Coins (65 gp): A mix of coins from different regions, looted from adventurers and forgotten chests.
- Silver Coins (120 sp): The kobolds have collected a decent amount of silver, carefully hidden in small pouches scattered in their personal storage.
- Copper Coins (300 cp): The most common currency among the kobolds, stored in small pots and bags near their beds.
- Small Gems (3 worth 10 gp each): A few low-quality gems—quartz and agate—kept as prized possessions for their shiny appearance.
Magical Items:
- Potion of Healing (2): Stored in a small, hidden box beneath the sergeant’s bedroll. These potions are kept for emergencies when defending the dungeon becomes dire.
- Scroll of Darkness (1): A single-use scroll that can be activated to cast the spell Darkness (as per the spell’s description), providing a significant advantage if the kobolds need to retreat or ambush intruders.

D4. Guard Post
- Description:
This small room sits at a critical junction between the prison cells and the deeper areas of the dungeon. It’s staffed at all times by at least three kobold guards. A thick wooden door with a barred window separates this room from the prisoner’s hallway, giving the kobolds a place to monitor the captives without being directly in the cells themselves. - Details:
The guard post is cluttered with old, rotting food, broken weapons, and crude dice used by the kobolds for games while on duty. A rack of spears and small shields leans against the wall, and a bell tied to a string serves as an alarm system. The room’s only source of light is a single lantern hanging from the ceiling, which flickers ominously in the damp air.
Kobold Guards with Short Swords and Spears (3)
The kobold guards are quick and nimble, wearing leather armor for mobility. They wield both a short sword and a spear, using the spear for ranged attacks and the short sword for close combat.
- Armor Class (AC): 7 (Leather Armor)
- Hit Points (HP): 8
- Speed: 30 ft
- Damage: 1-4 with sword or 1-6 with spear

D5. Prisoner Storage Room
- Description:
A cold, dark room with several large, wooden crates and barrels, many of which are covered in cobwebs. This room serves as a storage area for supplies meant for the prisoners: old, moldy food, filthy blankets, and broken chains. The floor is slick with moisture, and the smell of rot permeates the air. - Details:
Some of the barrels are filled with stagnant water, while others contain moldy bread and hard cheese. The crates are filled with various supplies, including rusted manacles, old shackles, and ancient prison uniforms. Occasionally, rats scurry through the room, searching for scraps. Hidden behind one of the crates is a small, Magical Amulet of +1 Protection that once belonged to a long-dead prisoner.
5a. The Secret Passage in the Dungeon Storage Room
Deep within the dungeon level of Castle Dreadthorn, hidden among the old storage rooms, lies a secret passage known to only a few of the castle’s most trusted servants. This hidden passage was once used by Vladimir Dreadthorn’s inner circle for discreet movement between the dungeon and the upper levels of the castle. Over the centuries, it has been concealed beneath layers of dust and debris, its existence all but forgotten.
If the adventurers use the secret entrance from the outside this is where they will emerge. With a distinct advantage.

D6. Flooded Chamber
Details:
The flooded chamber is used by the kobolds to dispose of waste and unwanted debris, to include humanoids, feeding them to the creatures lurking in the water below. The water itself smells foul, and there’s a constant buzzing of insects in the air. Occasionally, strange shapes can be seen moving in the water, and the adventurers may encounter a Giant Leech or other swamp-dwelling creature if they linger too long.
Multiple Kobold bones lie about, giving clues that “There might be something down here.”
Description:
This room is partially submerged in water, a result of the castle’s crumbling foundations and the encroaching swamp. The floor is covered with murky water, and the walls are slick with moss. The sound of dripping water fills the air, and small pools form in the corners of the room. There is a heavy, iron grate, broken open, in the center of the room that leads to the dungeon’s flooded lower sewer system.
A small chest, tucked in among other flooded goods and long forgotten, holds 100GP.
Giant Leech
- Armor class: 9
- Hit Points: 34
- Damage: 1-4
- Suction Grapple: If the giant leech hits with a bite attack, it can attempt to latch onto its target, grappling it. The target must succeed on a DC 13 Strength saving throw or be grappled. While grappled, the giant leech automatically deals bite damage at the start of each of its turns. The grapple ends if the leech is forced to move or if the creature breaks free using an action.

Main Level of Castle Dreadthorn:
The main level of Castle Dreadthorn is filled with dark, gothic architecture, eerie halls, and rooms that hint at the dark history of the castle. Once a grand fortress, now it serves as the base of operations for Vladimir Dreadthorn, his minions, and a small group of humans who have sworn allegiance to him. The air on this level is thick with tension, and the oppressive atmosphere is felt in every room. Here’s a description of 10 key rooms on the main level.

M1. Great Hall
- Description:
The Great Hall is a massive, high-ceilinged chamber where Vladimir Dreadthorn once hosted grand feasts and political gatherings. Now, it sits in a state of decay. The stone floor is covered in cracks, and the long banquet table is coated with dust and cobwebs. Dark tapestries depicting long-forgotten battles hang from the walls, and the massive hearth at the end of the hall stands cold, its fire long extinguished. - Details:
Faint whispers seem to echo in this room, as if the walls themselves are remembering the conversations and secrets that once passed through here. Occasionally, a flicker of movement can be seen in the shadows, suggesting the presence of spirits or invisible stalkers. - A group of Kobolds are taking their meal in the hall, eating their moldy bread and other unknown meaty items.
Kobold Squad in The Great Hall:
1. Kobold Sergeant (Leader of the Squad)
- Description: The sergeant is slightly larger and more decorated than the others, wearing a patchwork of leather armor with a small insignia of leadership. He sits at the head of the table, munching on a piece of stale bread while issuing orders.
- Armor Class (AC): 7 (Leather Armor, Shield)
- Hit Points (HP): 8
- Weapons:
- Short Sword:
- Hit: (1d6) piercing damage.
- Spear (Melee or Ranged):
- Hit: (1d6) piercing damage.
2-4. Kobold Spearmen (3 Guards)
- Description: These kobolds sit along the table, eating dried meats and grumbling about their duties. They each have a spear resting nearby, and their eyes dart nervously between each other, always wary of being reprimanded by their sergeant.
- Armor Class (AC): 8 (Leather Armor)
- Hit Points (HP): 4
- Weapons:
- Spear (Melee or Ranged): range 20/60 ft., one target.
- Hit: (1d6) piercing damage.
- Abilities:
- Pack Tactics: Advantage on attack rolls if at least one kobold ally is within 5 feet of the target.
5-7. Kobold Archers (3 Guards)
- Description: These kobolds sit together at the far end of the table, talking quietly and sharpening their arrows. They are used to patrolling the higher vantage points of the castle and are more comfortable keeping their distance in combat.
- Armor Class (AC): 8 (Leather Armor)
- Hit Points (HP): 4
- Weapons:
- Shortbow (Ranged Weapon Attack): range 80/320 ft., one target.
- Hit: (1d6) piercing damage.
- Dagger (Melee Weapon Attack): reach 5 ft., one target.
- Hit: (1d4) piercing damage.
8-10. Kobold Swordfighters (3 Guards)
- Description: These kobolds are the most aggressive of the group, armed with short swords. They chatter about their recent skirmishes and trade insults with the spearmen, eager for action.
- Armor Class (AC): 7 (Leather Armor)
- Hit Points (HP): 4
- Weapons:
- Short Sword (Melee Weapon Attack): +4 to hit, reach 5 ft., one target.
- Hit: (1d6) piercing damage.
Tactics:
- Pack Tactics: The kobolds rely heavily on Pack Tactics, giving them advantage when they work together in combat. The sergeant directs their actions and is quick to inspire them if things become dangerous.
- Ranged and Melee Coordination: The archers prefer to keep their distance, while the swordfighters and spearmen engage directly, working in tandem to overwhelm their foes.
Kobold Banter:
The kobolds chatter and laugh at each other, sometimes mocking one another for recent failures or victories. They speak in their native tongue, and their voices carry through the hall, creating an eerie echo in the cavernous space. Occasionally, they glance up at the portraits or tapestries on the walls, as if expecting Dreadthorn or one of his lieutenants to walk in and reprimand them.
This squad of kobolds would normally be stationed elsewhere in the castle or out on patrol but have taken a moment to rest and talk in the once-glorious Great Hall, unaware of any impending threats or danger nearby.
Summary of Kobold Treasure:
- Coins: Around 10 gp, 15 sp, and 40 cp total across the kobold’s purses.
- Trinkets and Miscellaneous: Small, almost worthless items such as shiny rocks, buttons, feathers, and bone knives.
These kobolds don’t carry much valuable treasure, but they do hoard a variety of small, odd items that could be of interest to the adventurers, especially the rusty key and the Healing Potion held by the sergeant.

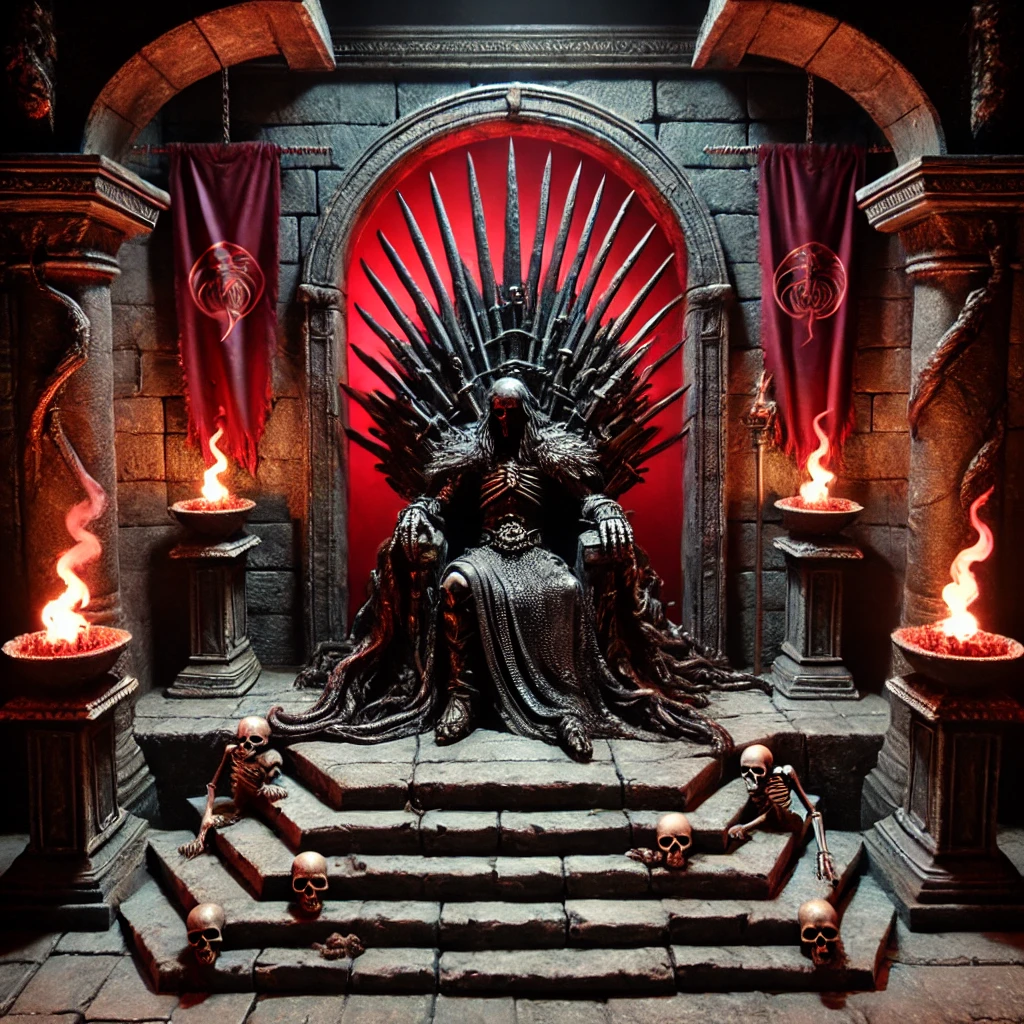
M2. The Throne Room
- Description:
At the heart of the main level lies the Throne Room, where Vladimir Dreadthorn still sits on a dark, twisted throne made of black iron and bones. The room is dimly lit by eerie red torchlight, casting long, ominous shadows. The throne is elevated on a platform, with cold stone steps leading up to it. The walls are adorned with crimson banners and skeletal remains, a testament to Dreadthorn’s dark reign. - Details:
The room is eerily silent, save for the occasional creak of stone or the distant rustle of banners. It is said that Dreadthorn sometimes sits here in total stillness for hours, contemplating his plans or communing with dark forces.

Vladek Blackthorn (Vampire Associate)
Vladek Blackthorn—an associate vampire, is a cunning and ruthless lieutenant of the vampire lord. While he is not as powerful as Dreadthorn himself, Vladek has been entrusted with managing the castle in Dreadthorn’s absence and maintaining order over the various undead and kobold forces. Vladek is a tactician, preferring to weaken his enemies before engaging them directly.
He is currently meeting with two human mercenaries.
Statistics:
- Armor Class (AC): 6 (Leather armor +2)
- Hit Points (HP): 144 (17d8 + 68)
- Speed: 30 ft.
Abilities:
- Regeneration: Vladek regains 10 hit points at the start of his turn if he has at least 1 hit point and isn’t in sunlight or running water. If Vladek takes radiant damage or damage from holy water, this trait doesn’t function at the start of his next turn.
- Spider Climb: Vladek can climb difficult surfaces, including upside down on ceilings, without needing to make an ability check.
- Shapechanger: As an action, Vladek can transform into a bat or a misty cloud. In bat form, his flying speed is 30 ft., and in mist form, he has a flying speed of 20 ft. and can pass through small spaces.
- Legendary Resistance (3/Day): If Vladek fails a saving throw, he can choose to succeed instead.
- Charm (Recharge 5-6): Vladek can target one humanoid he can see within 30 feet of him. If the target can see Vladek, it must succeed on a DC 17 Wisdom saving throw or be magically charmed by Vladek. The charmed target regards Vladek as a trusted friend to be heeded and protected.
Actions:
- Multiattack: Vladek makes two attacks, either with his rapier or his bite.
- Rapier Strike:
- Melee Weapon Attack: +3 Rapier, 1d8 damage +3.
- Bite:
- Melee Weapon Attack: reach 5 ft., 1d4.
- Children of the Night (1/Day): Vladek magically calls 2d4 swarms of bats or rats, provided that the sun isn’t up. While outdoors, Vladek can call 3d6 wolves instead. The called creatures arrive in 1d4 rounds, acting as allies of Vladek and obeying his spoken commands. The beasts remain for 1 hour, until Vladek dies, or until he dismisses them as a bonus action.
Vladek Treasure:
- Vladek’s Signet Ring (worth 50 gp): A symbol of his rank in Dreadthorn’s hierarchy.
- Bloodstone Pendant: A dark red gemstone with minor necrotic magic that grants Vladek resistance to necrotic damage.
- Dagger of Bloodletting (Magical) +1: A curved dagger that deals 1d4 additional necrotic damage on a hit (1d4). Vladek keeps this as a personal weapon.
- +3 Rapier sword 1d8 damage.
- Purse with 50gp for the mercenary pay.

Human Mercenaries Meeting with Vladek Blackthorn
These mercenaries have been hired by Vladek Blackthorn to help him secure Castle Dreadthorn’s interests, especially with its crumbling defenses. While they are not fully aware of Vladek’s vampiric nature, they sense the danger he represents and work for him due to the gold he promises.
1. Ronan “Ironhand” Draven
- Description:
- Ronan is a seasoned warrior in his early 40s, with weathered skin, dark brown hair streaked with gray, and a thick beard. His face bears numerous scars from years of combat, and his right hand is encased in a heavy iron gauntlet, earning him the nickname “Ironhand.” He has a stoic demeanor, preferring action over talk.
- Appearance: He wears a suit of chain mail with a battered iron breastplate over it. His gear is functional but shows signs of wear.
- Armor Class (AC): 6 (Chain Mail, Shield)
- Hit Points (HP): 55
- Weapons:
- Longsword: reach 5 ft., one target (1d8 + 5) slashing damage.
- Iron Gauntlet (Unarmed Strike): reach 5 ft., one target (1d6 + 3) bludgeoning damage.
- Heavy Crossbow (Ranged Weapon Attack): +4 to hit, range 100/400 ft., one target (1d10) piercing damage.
- Treasure:
- Gold Pouch (35 gp): Payment from Vladek for his services.
- Vial of Oil (1): A small vial of oil he uses to maintain his weapons and armor.
- Ironhand’s Signet Ring: A family heirloom worth 25 gp, worn on his left hand, with a personal engraving of a clenched fist.
2. Leona “Steelheart” Gray
- Description:
- Leona is a fierce and pragmatic fighter in her early 30s with short-cropped black hair and piercing green eyes. Her imposing physique and grim demeanor have earned her the nickname “Steelheart” due to her cold and ruthless combat style. She prefers to wear light armor for agility, relying on her quick reflexes and deadly strikes.
- Appearance: Leona wears a set of studded leather armor reinforced with iron plates along the shoulders and bracers. She carries a short sword and a small dagger strapped to her boot.
- Armor Class (AC): 5 (Studded Leather Armor)
- Hit Points (HP): 44
- Weapons:
- Short Sword: reach 5 ft., one target (1d6) piercing damage.
- Dagger (Melee or Ranged): reach 5 ft. or range 20/60 ft., one target 1d4 + 4) piercing damage.
- Light Crossbow (Ranged Weapon Attack): +5 to hit, range 80/320 ft., one target (1d8 + 3) piercing damage.
- Treasure:
- Gold Pouch (40 gp): Payment from Vladek for her services.
- Healing Potion (1): A small potion she keeps in a leather pouch.
- Steelheart’s Pendant: A small iron pendant in the shape of a shield, which she keeps for sentimental reasons (worth 10 gp).
- Lockpicks (Set): A small set of lockpicks hidden in her boot, useful for getting into places she shouldn’t be.

3. The Chapel of Shadowed Faith
- Description:
Once a place of holy worship, the chapel has been corrupted by Dreadthorn’s dark magic. Now known as the Chapel of Shadowed Faith, the stone altar at the center of the room is cracked, and the stained glass windows that once depicted angels and saints are now shattered, with only shards remaining. The room is dim, with a strange, unholy aura lingering in the air. - Details:
Bloodstains can be seen on the altar, and symbols of dark gods are etched into the stone floor. A cold draft blows through the room, making any flames flicker ominously. Occasionally, the faint sounds of ghostly chanting can be heard, echoing from nowhere. - The room has been stripped of anything of value. Although, it may make a good hiding place for a rest.

4. The Armory
- Description:
The Armory is where the castle’s weapons and armor are stored. Though once filled with well-maintained gear, the room is now in a state of neglect. Rusted swords, pikes, and shields line the walls, while shattered pieces of armor lie scattered on the floor. A few weapon racks still hold serviceable equipment, though they are often cursed or corrupted by dark magic. - A +2 Longsword has been left behind in a tattered scabbard.
- Details:
Strange whispers seem to emanate from some of the weapons, particularly a set of cursed blades that once belonged to fallen knights. The air here feels heavy, as if weighed down by the memories of countless battles.

5. The Banquet Hall (Used by Human Servants)
- Description:
Unlike most of the castle, this room is still used by the humans who serve Vladimir Dreadthorn. The Banquet Hall is a modest chamber compared to the rest of the castle, but it is functional. The humans gather here to eat their meals, served from the castle’s dwindling supply of provisions. The room has a low, wooden ceiling, and a large table sits in the center with mismatched chairs surrounding it. - Details:
The humans in Dreadthorn’s service are tense and wary, knowing full well the dangers that lurk in the castle. The room is dimly lit by a few candles, and the atmosphere is heavy with unease. Conversations are hushed, and the food is bland and scarce, often little more than stale bread and thin soup. The room smells of damp wood and mildew.
1. Harrick Fenlow
- Role: Head Servant / Steward
- Description: Harrick is a middle-aged man in his late 40s, with thinning gray hair and a gaunt frame. His eyes are sunken, and his face shows signs of stress and sleepless nights, a reflection of the constant anxiety he endures serving Dreadthorn’s castle. He wears a simple, dark gray tunic and carries a small ledger, where he keeps track of meals, supplies, and the other servants.
- Personality: Harrick is a practical man, doing whatever it takes to stay alive. He does not question orders and avoids unnecessary conflict. His loyalty lies with whoever keeps him safe, and while he knows Dreadthorn’s true nature, he remains silent out of fear.
- Abilities: Harrick is not a combatant but is clever and resourceful. He can help the adventurers navigate the castle or provide information in exchange for safety.
- Treasure: Harrick carries a pouch with 15 silver pieces, given to him as payment, and a rusty iron key to the pantry.
2. Isolde Whitemane
- Role: Cook
- Description: Isolde is a robust woman in her mid-30s, with light brown hair tied in a messy bun. Her hands are calloused from years of cooking, and she often has a streak of flour or grease on her face. She wears a stained apron over a worn-out tunic, and despite the grim surroundings, she tries to maintain some semblance of normalcy by keeping the kitchen running and feeding the humans in the castle.
- Personality: Isolde is pragmatic, though she shows compassion for her fellow human servants. She despises Dreadthorn but believes there’s no escape from his control. She quietly resents her situation but holds onto the hope that one day she might find a way out.
- Abilities: Isolde can handle herself in a kitchen brawl with a cleaver, but she avoids violence. She is knowledgeable about the castle’s food supply and can offer information on safe routes within the castle, as she delivers food to different parts.
- Treasure: Isolde keeps a small locket with a faded picture of her family (worth 10 gp), and she has a healing salve in a tin, which can restore 1d4+1 hit points.
3. Rothar Grimfoot
- Role: Stablehand / Runner
- Description: Rothar is a wiry man in his early 20s, with short, messy black hair and a perpetually dirty face. He spends most of his time either running errands for the kitchen staff or tending to the remaining horses in the stables. He wears patched-up trousers and a loose-fitting tunic, with a leather belt holding a small dagger. Despite his youth, Rothar is cynical and weary from his time at the castle.
- Personality: Rothar is sharp-tongued and quick-witted, often making sarcastic remarks about the castle’s inhabitants. He has little respect for authority, but like the others, he’s too scared to openly defy Dreadthorn. He is always looking for a way out, and if adventurers offer him an opportunity to escape, he would take it.
- Abilities: Rothar is quick on his feet and knows the layout of the castle’s exterior, including secret exits from the stables and courtyards. He can help adventurers navigate the grounds.
- Treasure: Rothar keeps a rusty dagger (1d4 piercing damage) and a small pouch with 8 copper pieces. He also has a set of lockpicks (DC 10 Dexterity to use), which he uses to sneak into rooms for food or loot.
4. Lenara Silverthorn
- Role: Serving Maid
- Description: Lenara is a quiet, petite woman in her late 20s, with long, unkempt blonde hair that she tries to keep hidden under a dark headscarf. Her pale blue eyes reveal her constant state of anxiety, but she carries out her duties without complaint. She wears a simple dress with patched sleeves and is often seen carrying trays of food or cleaning the banquet hall and nearby chambers.
- Personality: Lenara is timid and avoids drawing attention to herself, terrified of the castle’s dark masters. She speaks softly and flinches at sudden noises, but she is highly observant. She has witnessed things she dares not speak of and knows more about the castle’s secrets than she lets on.
- Abilities: Lenara is perceptive and can provide valuable information about the castle’s inhabitants, including their routines and weaknesses. She will help the adventurers only if they promise to protect her.
- Treasure: Lenara has a silver ring (worth 25 gp), a keepsake from her former life before being trapped in the castle, and a small vial of holy water, which she keeps hidden beneath her clothing for protection against the undead.
Interactions:
- These four human servants are neutral and fearful, more concerned with their own survival than loyalty to Dreadthorn. If the adventurers can convince them that helping might lead to their freedom or survival, they may offer valuable information or assistance. However, betraying them or showing hostility would cause them to retreat and refuse to aid the party.
- None of them are trained for combat, but they each have specialized knowledge of different parts of the castle and can serve as guides, informants, or help with non-combat tasks. If treated well, they could prove useful allies in navigating the dangers of Castle Dreadthorn.

6. The Library of Forgotten Tomes
- Description:
This massive, dust-covered library contains ancient, forbidden knowledge and countless books about necromancy, dark magic, and vampiric lore. Shelves stretch from floor to ceiling, filled with crumbling scrolls and ancient manuscripts. The air smells of old parchment and decay, and cobwebs hang between the shelves. Some of the books are enchanted, glowing faintly in the dim light. - Details:
The room is unnervingly quiet, save for the occasional creak of the wooden floorboards. A few of the books are cursed and can trap unwary readers in their pages. There’s also a hidden section of the library that contains powerful, forbidden spells, locked behind a magical barrier. - Here are three magical tomes that adventurers might find in the dust-covered library of Castle Dreadthorn, filled with ancient, forbidden knowledge about necromancy, dark magic, and vampiric lore:
1. The Grimoire of Eternal Night
- Type: Wondrous Item (Rare, requires attunement by a spellcaster)
- Description: This large, leather-bound tome is covered in a dark, glossy hide that seems to shift and move when touched. The edges of the pages are blackened, and the symbols on the cover glow faintly in the dark. Inside, the text is written in an ancient vampiric script, describing powerful necromantic spells and rituals meant to shroud the world in eternal night.
- Magical Properties:
- Night’s Veil (Once per long rest): The tome allows the caster to summon an area of magical darkness, 20 feet in radius, for 1 hour. Unlike normal darkness, this effect cannot be dispelled by light and any non-magical light sources are immediately extinguished. Creatures with darkvision cannot see through this darkness, but vampires and undead allied with the caster gain advantage on attacks while within the area of effect.
- Vampiric Curse (1/Day): The caster can curse a humanoid target within 60 feet. The target must succeed on a DC 15 Constitution saving throw or suffer from the Vampiric Curse. Each time the cursed creature attacks, they must make a DC 15 Wisdom saving throw or take 2d6 necrotic damage and heal the caster for the same amount. This curse lasts for 1 minute.
- Drawback: Each time a spell is cast using the Grimoire of Eternal Night, the user must succeed on a DC 14 Wisdom saving throw or suffer from the curse of Eternal Hunger, becoming famished and unable to benefit from food or rest for the next 24 hours.
2. The Codex of Blood Binding
- Type: Wondrous Item (Very Rare, requires attunement by a spellcaster)
- Description: This ancient tome is bound in deep crimson leather, with silver runes etched into its cover. The pages within are filled with dark, ritualistic blood magic practices, many of which detail how to bind and control the life force of others. A faint, metallic smell lingers around the book, and those who touch it often feel an unsettling pulse of energy.
- Magical Properties:
- Blood Pact (1/Day): By performing a blood ritual described in the codex, the caster can bind themselves and up to three willing creatures in a Blood Pact for 24 hours. While the pact is active, all participants can share hit points. When one takes damage, another can use their reaction to transfer the damage to themselves. Additionally, all creatures in the pact gain a +1 bonus to attack rolls while the pact is active.
- Life Drain (1/Day): The caster can target a creature within 60 feet and attempt to drain its life force. The target must succeed on a DC 16 Constitution saving throw or take 4d8 necrotic damage, and the caster regains hit points equal to half the damage dealt. If the target dies from this spell, the caster also gains temporary hit points equal to the damage dealt.
- Drawback: Each time the caster uses the Codex of Blood Binding, they must sacrifice a small amount of their own blood, taking 1d6 necrotic damage that cannot be healed until a long rest. Additionally, the book slowly influences its user, driving them to crave control over others.
3. The Book of Dread Shadows
- Type: Wondrous Item (Legendary, requires attunement by a spellcaster)
- Description: This ancient tome is bound in dark, cracked leather that emits a faint aura of cold. The book’s cover is adorned with an intricate pattern of swirling shadows, and the pages seem to shift and change as if written by a hand that never rests. The Book of Dread Shadows is said to contain the deepest secrets of shadow magic and vampiric lore, passed down through generations of powerful necromancers.
- Magical Properties:
- Summon Shadow Minions (Once per long rest): The caster can summon 2d4 shadows to aid them in battle for up to 1 hour. The shadows obey the caster’s commands and act on their initiative. They can be commanded to attack, scout, or protect the caster.
- Shadow Walk (1/Day): By reading a passage from the book, the caster can step into the shadow plane, allowing them to teleport up to 120 feet to any location that is dimly lit or in darkness. Upon emerging from the shadows, the caster can make a single attack with advantage.
- Dread Presence (1/Day): The caster can invoke a terrifying aura of shadows, causing all creatures within 30 feet to make a DC 17 Wisdom saving throw or be frightened of the caster for 1 minute. While frightened, creatures must use their movement to flee and have disadvantage on attack rolls and ability checks.
- Drawback: The Book of Dread Shadows is cursed. Each time the caster uses one of its abilities, they must succeed on a DC 15 Wisdom saving throw or begin hearing whispers from the shadow plane. These whispers cause disadvantage on Insight and Investigation checks for the next hour. After using the book’s abilities three times in a day, the caster also begins to suffer from nightmares, causing them to lose the benefits of a long rest.
These tomes, hidden in the vast, dust-covered library, are dangerous and potent. While they offer great power, they also come with risks, driving those who use them closer to the darkness that permeates Castle Dreadthorn. Any adventurer who dares to delve into their pages must weigh the power they grant against the curses they carry.
The Shaman’s would be happy to take them off the adventurers hand, for the sum of 2,000 GP each. If they can get past Lorian Darkveil, an evil magician.

Lorian Darkveil, the Shadowbinder
- Description:
- Lorian Darkveil is a pale, gaunt human magician in his late 40s, with a thin, almost skeletal frame. His long, black hair hangs loosely around his face, which is marked by deep-set, piercing eyes that glow faintly with an unsettling red hue. His complexion is ashen, and his lips are thin and perpetually curved in a cruel smirk. Lorian is dressed in dark, flowing robes that shimmer with shadowy energy, adorned with silver chains and dark runes that pulse faintly with magic. He carries a twisted black staff topped with an obsidian crystal that crackles with dark energy.
- Personality:
- Lorian is cold, calculating, and utterly ruthless. He has served Vladimir Dreadthorn for years, drawn to the vampire lord’s mastery of necromancy and dark magic. His ultimate goal is to unlock the secrets of eternal life without becoming a vampire himself. Lorian cares little for the lives of others, seeing them only as pawns or sacrifices for his experiments. He delights in testing his magic on those who dare oppose him and will not hesitate to eliminate anyone who threatens his work. He is arrogant and believes he is superior to most mortals.
- Role in the Library:
- Lorian spends much of his time studying ancient tomes in the library of Castle Dreadthorn, delving into necromantic lore and forbidden rituals. He is particularly interested in mastering shadow magic and is currently researching ways to manipulate the plane of shadows. If the adventurers disturb him while he is studying, he will immediately see them as intruders and use his dark magic to eliminate them, viewing their interference as an insult to his intellect and power.
Lorian Darkveil – Stats
- Armor Class (AC): 9 (Robes)
- Hit Points (HP): 32
- Speed: 30 ft.
- Level: 8th level Magician
- Lawful Evil
Abilities:
- Shadow Step (Recharge 5-6): As a bonus action, Lorian can teleport up to 60 feet to an unoccupied space. He leaves behind a shadowy image of himself that lingers for 1 round, confusing attackers. This makes him very difficult to kill if an attacker is not able to kill on the first attack. If he teleports away, then he will alert the others, and will reemerge somewhere else in the castle to fight again.
- Necromantic Scholar: Lorian has advantage on Intelligence (Arcana) checks related to necromancy and shadow magic. His expertise allows him to cast necromantic spells more effectively.
- Shadowbind (1/Day): Lorian can use his staff to summon tendrils of shadow to bind one creature within 60 feet. The target must succeed on a DC 16 Strength saving throw or be restrained for 1 minute. While restrained, the target takes 1d8 necrotic damage at the start of each of its turns. The target can repeat the saving throw at the end of each of its turns, ending the effect on a success.
Treasure:
- Obsidian Staff of the Shadowbinder: Lorian’s staff is a magical focus that allows him to cast Shadowbolt (3d6 damage) and grants him a +1 bonus to spell attack rolls. Additionally, the staff can be used once per day to cast Darkness as an action, 1,100 GP.
- Grimoire of Shadows (Tome): Lorian has been studying a forbidden tome that contains powerful shadow spells. This tome allows the user to learn and cast Shadow Walk (once per day), which allows the caster to teleport up to 120 feet through shadows. However, the tome is cursed—after each use, the caster must succeed on a DC 15 Wisdom saving throw or suffer from nightmares that prevent them from benefiting from a long rest, 1,250 gp.
- Potion of Necrotic Resistance: A dark vial containing a thick, swirling liquid that grants resistance to necrotic damage for 1 hour, 123 GP.

7. The Hall of Mirrors
- Description:
This narrow hallway is lined with tall, ornate mirrors that reflect the cold, flickering torchlight. However, these are not ordinary mirrors—some show distorted, nightmarish reflections of those who pass by, while others seem to reflect nothing at all. It is said that these mirrors hold the souls of those who have been trapped by Dreadthorn’s magic. - Details:
As adventurers walk down this hallway, their reflections may speak to them or reveal glimpses of their darkest fears. Occasionally, strange figures can be seen moving behind the mirrors, as if waiting to step out and claim another victim.

8. The Gallery of Lost Souls
- Description:
The Gallery is a long room filled with portraits of those who once served the Dreadthorn family. Each painting is eerily lifelike, with the eyes of the subjects seeming to follow any who pass through the room. Many of the portraits are of former human servants, nobles, and soldiers who fell under Dreadthorn’s influence. - Details:
The air here feels cold, and the floor is covered in dust. Some say that the souls of those depicted in the paintings are trapped within the portraits, and their expressions occasionally shift when no one is looking. Occasionally, a faint whisper or laugh can be heard, though its source is never seen.

Mimic in The Gallery of Lost Souls
In The Gallery of Lost Souls, the mimic takes the form of one of the many eerily lifelike paintings that line the walls. This particular mimic appears as a grand, ornate portrait of an ancient noble, with haunting eyes that seem to follow anyone passing by. However, when adventurers get too close or linger for too long, the painting itself morphs and attacks, revealing its true nature as a deadly mimic. Its usual diet is that of kobolds, and several kobold bones and weapons can be found near the painting giving a clue to the unseen danger, to an astute adventurer.
Mimic (Gallery Painting) – Stats
- Armor Class (AC): 7 (natural armor)
- Hit Points (HP): 58
- Speed: 15 ft. (in painting form), 30 ft. (in transformed form)
- Damage: 2d6
Tactics:
- The mimic will wait in painting form until adventurers are distracted by the eerie, lifelike portraits in the gallery. Once they get close, it will lash out with its pseudopod to grapple and hold them in place.
- After grappling, it will bite the target, dealing both piercing and acid damage as it tries to drag them into its frame. The adhesive nature of its form makes it difficult to escape once trapped.
- If seriously injured, the mimic will attempt to retreat by reverting to its painting form, hoping to confuse the party into thinking it is just another decoration in the room.

9. The Servants’ Quarters
- Description:
This cramped, dimly lit room is where the human servants sleep. The wooden beds are small and uncomfortable, with thin, moth-eaten blankets. The walls are bare, save for a few rusty hooks where the servants hang their ragged clothes. A single candle burns on a small table, casting long shadows across the room. - Details:
The atmosphere in the room is tense and cold, with the occasional sound of rats scurrying through the walls. Most of the human servants barely sleep, as they fear what lurks in the castle at night. There is a small hidden compartment under one of the floorboards where a servant has stashed a journal detailing the horrors they’ve witnessed.

10. The Black Staircase
Details:
The staircase is lit by a series of iron sconces that hold flickering, blue-tinged flames. Shadows twist and move on the walls, seemingly of their own accord. It is said that spirits of the dead sometimes wander these stairs, and those who ascend or descend them feel an oppressive weight pressing down on their shoulders.
Description:
This narrow, winding staircase connects the main level to the lower dungeons and upper floors of the castle. The steps are worn and uneven, and the walls are slick with moisture. A strange, cold draft seems to constantly blow up the stairs, carrying with it the faint scent of decay and mildew.

The Second Floor of Castle Dreadthorn
The second floor of Castle Dreadthorn is where the more private and personal chambers are located, as well as areas used for plotting, magic, and the secret dealings of Vladimir Dreadthorn and his associates. The architecture is gothic and cold, with stone walls and grand, tall windows, though most of the rooms are now in a state of decay. Here are ten rooms on the second floor of the castle:

The Ruined Chamber (Another Way In)
Dangerous Ledge: The broken floor near the collapsed wall is unstable, and portions of the remaining stone may give way if stepped on. Anyone moving carelessly near the ledge may cause a minor rockslide or fall into the swamp below.
Description: The Ruined Chamber is a once-lavish sitting room located on the second floor of Castle Dreadthorn, now partially collapsed and open to the elements. Over time, the castle’s neglect and the encroaching Verminwood Marshes have caused part of the wall to crumble away, leaving a gaping hole that adventurers could use to sneak into the castle from the outside, or, to escape from.
The chamber is cluttered with debris, broken furniture, and thick vines that have crept through the breach, creating an eerie, overgrown appearance. The remnants of a large fireplace dominate one side of the room, while the collapsed wall opens out to a dangerous ledge overlooking the swamp below.
Features:
Collapsed Wall: The room’s northern wall has entirely collapsed, creating a rough, uneven opening large enough for several adventurers to slip through. Moss and creeping vines hang down from the exposed stone, providing a natural, albeit precarious, climbing route from the marsh below.
Broken Furniture: Shattered remnants of once-fine chairs, tables, and a tattered rug are strewn about the floor, covered in dust and grime. The decay is evident, but the room’s former grandeur is still visible in the carved woodwork and faded tapestries that cling to the remaining walls.
Vines and Overgrowth: Thick vines have taken root in the room, climbing up the walls and spreading across the floor. Some of these vines appear unnaturally strong and may make movement treacherous for the unwary.

1. Lord Dreadthorn’s Bedchamber
- Description: This is the lavish, but dark, personal bedchamber of Vladimir Dreadthorn. A massive four-poster bed draped with black silk dominates the room. Blood-red curtains hang from the windows, blocking any natural light. The walls are adorned with portraits of long-dead family members and dark tapestries. A grand, intricately carved wooden wardrobe sits in one corner, and a writing desk covered in cryptic notes and letters occupies another.
- Features: The bed has hidden compartments containing Vladimir’s personal journal and a Dagger of Vampiric Make +3 (1d6 damage). The wardrobe contains several elegant but ancient cloaks and robes.
- Secret: Beneath the floor is a trapdoor leading to the hidden vault below.
Lord Vladimir Dreadthorn
Vladimir Dreadthorn is an ancient and powerful vampire lord who rules over Castle Dreadthorn and the surrounding lands. His presence is one of immense dread, and his name is feared among both humans and undead alike. Over the centuries, Vladimir has grown in power through the use of dark magic, necromancy, and vampiric manipulation. He is ruthless, cunning, and obsessed with gaining eternal dominance over life and death.
Lord Vladimir Dreadthorn –
- Armor Class (AC): 0 (Leather armor +2)
- Hit Points (HP): 64
- Speed: 30 ft. (walking), 40 ft. (flying – bat form)
- Ring of Protection +3
- Cloak of Elvenkind
- Rapier +4 (1d10 of damage/ +4 to damage)
Abilities:
Children of the Night (1/Day): As an action, Vladimir can summon 2d6 wolves or 1d4 swarms of bats to his aid. The summoned creatures arrive in 1d4 rounds and serve him loyally for up to 1 hour or until they are slain.
Regeneration: Vladimir regains 20 hit points at the start of his turn if he has at least 1 hit point and isn’t in sunlight or running water. If Vladimir takes radiant damage or damage from holy water, this trait doesn’t function at the start of his next turn.
Shapechanger: Vladimir can use his action to polymorph into a bat or mist or back into his true form. While in bat form, he has a flying speed of 40 feet and retains his bite attack. While in mist form, he cannot take damage but also cannot attack, cast spells, or manipulate objects. If Vladimir is losing the fight, there is a 30% chance he will morph and flee the castle into the moors outside.
If Vladimir does escape, see the special note at the end of the adventurer. Vladimir will rally what forces he can and counter attack while the party tries to get back to the village while they are in the swamps.
Vampiric Charm: As an action, Vladimir can target one humanoid within 30 feet. The target must succeed on a DC 17 Wisdom saving throw or be charmed by Vladimir for 24 hours. The charmed target regards Vladimir as a trusted ally to be heeded and protected.
Treasure in the room:
- 1,250 GP in a small chest.
- 2,450 SP in a small chest.
- Tapestries worth 500 GP each x3.

2. The Sanctum of Blood
- Description: This room is a private ritual chamber, used by Dreadthorn and his closest followers for dark blood magic rituals. The stone floor is engraved with a massive sigil of vampiric power, and a blood-stained altar stands at the center of the room. Several iron chains hang from the walls, and candles made from black wax flicker eerily, casting long shadows.
- Features: The altar allows for dark magic rituals, including necromancy and blood sacrifices. A Bloodstone Amulet (250gp) rests on the altar, radiating dark power.

3. The Map Room
- Description: This room contains a large, round table with a map of the surrounding lands, marked with strategic points of interest. Dark banners depicting Dreadthorn’s crest hang from the walls, and various weapons are displayed in racks. Several high-backed chairs, each with a vampiric motif, surround the table, suggesting this is where battle plans were made.
- Features: The map table is enchanted, showing magical projections of real-time movements of creatures or forces near the castle. If returned to the shamans, they will offer 2,000 GP for the map.
- Secret: There is a hidden drawer in the table that contains letters detailing alliances and enemies, including potential plans against rival vampire lords.
- A second mimic is hidden in the room disguised as a book case.
Mimic (Bookcase Form)
- Speed: 15 ft. (bookcase form), 30 ft. (mimic form)
- Armor Class (AC): 7 (natural armor)
- Hit Points: (HP): 68
- Damage: 3-12

4. The Library of Shadows
- Description: This private library is smaller than the main library but filled with 10 rare and forbidden texts on shadow magic, necromancy, and the history of vampires. The shelves are lined with ancient tomes, many of which glow with dark energy. A single reading desk sits in the center, with a silver candelabra (150 sp) providing dim light.
- Features: The tomes here contain powerful necromantic spells and knowledge. Some of the books are trapped.
- Traps: If the adventurers begin to sift through the books, there is a 5% chance they will activate one of the book traps. These will release a poisonous gas causing 1d10 of damage for all party members in the room. There are 5 book traps.
- Treasure: There are 10 books that are of exceptional value, and if the adventures slip away with them, are worth 250 gp on the open markets (a total of 2,500 gp).

5. Lorian Darkveil Quarters
- Description: This series of rooms was once used to house noble visitors and allies. The rooms are furnished with four-poster beds, velvet armchairs, and faded tapestries. Each guest room is slightly different, but all share the same air of neglect and coldness. Despite the luxury, there is a distinct sense of unease.
- Now Lorian Darveil uses this room. If he has been wounded in combat, he will be here resting to regain his full strength again.
- Features: One of the rooms contains an enchanted mirror that shows visions of other parts of the castle. The other rooms contain old, unused clothing, fine but now worthless.
- Secret: One of the wardrobes has a false back leading to a secret passage into the castle’s lower levels.
If Lorian has been defeated then this room, will be ripe for the plunder.
If he was encountered on the first floor and not defeated, he will be here resting, and regrouping for the next fight. He will have the advantage this time.
If the adventurers sneak in from the second floor collapsed room, and find this room empty, then Lorian will sense someone is in his room, and will teleport here from the first floor, surprising the adventurers from the rear and he will have the advantage on the attack. If he is losing, he will teleport to the lower level of the castle.
Treasure List for Lorian Darkveil:
Coin Pouch
- Contents: Contains 25 gold pieces, 40 silver pieces, and a small ruby (worth 50 gp).
- Description: A well-worn leather pouch that Lorian keeps tied to his belt. It clinks with the sound of coins, indicating his wealth and readiness to pay for rare tomes or components.
Scroll of Animate Dead
- Type: Scroll (Uncommon)
- Description: A scroll rolled in black ribbon with a seal of a skeletal hand pressed into black wax.
- Properties:
- Allows the user to cast Animate Dead once. The scroll is consumed upon use.
Cloak of Shadows
- Type: Magical Cloak
- Description: A long, dark cloak that appears to absorb the light around it, making the wearer harder to spot in dim light or darkness.
- Properties:
- Grants advantage on Stealth checks made in darkness or dim light.
- Once per day, the wearer can cast Invisibility on themselves for 10 minutes.
- The cloak is slightly frayed at the edges and appears worn from extensive use.

6. The Hall of Ancestors
- Description: A long, dimly lit hallway lined with large portraits of the Dreadthorn family’s ancestors. The paintings are unnerving, as the eyes seem to follow anyone walking through the hall. At the end of the hallway is a large, full-body portrait of Vladimir Dreadthorn himself, looming over the rest.
- Features: This hallway is enchanted, and the portraits serve as magical sentinels. Any intruder who lingers too long or disrespects the portraits may trigger a curse or summon a wraith (50% chance of triggering the wraith to investigate).
- Secret: The large portrait of Vladimir hides a secret door leading to a small treasury.
Wraith
- Armor Class: 4
- Hit Points: 43
- Attacks: 1
- Damage: 1d6

6A. Small Treasury
- 500 GP in a chest.
- 1,500 SP in a chest.
- 3,350 CP in a chest.
- A pouch of rubies x 10 worth 50 GP each.
7. The Trophy Room
- Description: This room contains various trophies from Dreadthorn’s victories. The heads of slain beasts are mounted on the walls, and in glass cases are weapons and armor taken from his defeated enemies. Some of the trophies are gruesome, such as a mounted werewolf pelt and a glass jar filled with vampire fangs.
- Features: The weapons and armor on display are magical, though some are cursed. Items include a Sword of demon slaying (Longsword +2) and a Shield of Fiendish Defense +1.
- Secret: One of the glass cases contains a trapped item—attempting to take it will activate a glyph of warding that causes a violent explosion. 25% chance of activation causing 1d6 damage to the party goers in the room.
8. The Hall of Whispers
- Description: This narrow, shadowy corridor is filled with faint, eerie whispers that seem to echo from the walls. The corridor twists and turns, leading to various parts of the second floor. Anyone walking through the hall will feel as though unseen forces are watching and murmuring just out of earshot.
- Features: The whispers in the hallway are an enchantment meant to disorient intruders. Anyone moving through the hall must make a DC 12 Wisdom saving throw or be frightened for 1 minute.
9. The Guard Quarters
- Description: This barracks-like room houses the human mercenaries who serve under Dreadthorn. They are currently resting before their next raid. Several bunk beds are arranged against the walls, and there are tables in the center of the room where the guards play cards and dice. Armor and weapons are strewn about, with some still functional but much of it rusted.
- Features: There are shortswords, spears, and crossbows in varying states of repair, along with basic armor. The guards are not always present, but the room is clearly well-used.
- Secret: Hidden under one of the beds is a small stash of gold 225 pieces and 175 silver pieces, looted from the surrounding villages.
Human Mercenaries x 10
- Level 1 Fighters
- Hit Points: 8 each
- Armor Class: 8 each (leather armor)
- Damage: 1d6 (short swords)

10. The Master’s Study
Secret: A drawer in the desk contains a ring of necrotic power that grants the wearer resistance to necrotic damage but slowly corrupts their soul over time.
Description: This is Dreadthorn’s private study, where he conducts his dark research and plans his next moves. A large, ornately carved desk sits in the center, covered in old scrolls and letters. Shelves along the walls hold books and jars filled with strange substances. A large window looks out over the marsh, but it is perpetually covered with thick, black curtains. A side door leads to a walkway across the moat to the tower level.
Features: The desk contains letters and magical scrolls, detailing Dreadthorn’s dealings with other vampire lords. There is also an alchemical kit with materials for creating potions or poisons.

Tower Level of Castle Dreadthorn:
The tower of Castle Dreadthorn is an isolated, ominous structure that rises high above the rest of the castle, looming over the Verminwood Marshes. The tower has several levels, with the highest rooms reserved for Vladimir Dreadthorn’s darkest rituals and secret experiments. It is a place few have ventured and fewer still have returned from. The air is colder here, and the sensation of dark magic is palpable.

First Floor of the Tower: The Arcane Observatory
- Description:
The first room of the tower is known as the Arcane Observatory, a chamber where Vladimir Dreadthorn conducts his studies of the stars and magical constellations. The room is circular, with tall, arched windows that stretch from the floor to the ceiling, providing a view of the night sky. The windows are enchanted to show the stars even when the sky is shrouded in fog or clouds. A large, brass astrolabe sits in the center of the room, surrounded by scattered parchment, quills, and ancient tomes filled with dark knowledge. The floor is covered in intricate runes and glyphs that glow faintly with arcane energy. - Details:
The Arcane Observatory is dimly lit, with the only light coming from the glowing runes on the floor and the cold, flickering flames of black candles placed around the room. The atmosphere is thick with magic, and a faint hum of energy can be felt in the air. The walls are lined with bookshelves filled with scrolls and grimoires related to astrology, necromancy, and dark rituals. At the far end of the room is a tall, polished brass telescope (1,500 gp) that Dreadthorn uses to gaze into the stars, searching for celestial omens and guidance from darker forces. Occasionally, the stars seen through the enchanted windows shift unnaturally, as if the very sky is under Dreadthorn’s influence. The astrolabe spins slowly on its own, adjusting to the unseen forces at work. The runes on the floor are part of a powerful ritual circle, used by Dreadthorn to channel energy from the stars into his experiments.
Second Floor of the Tower: The Gargoyle Lair
The second level of Castle Dreadthorn’s Tower is a dark and foreboding chamber known as the Gargoyle Lair, where a group of loyal and menacing gargoyles serve as Vladimir Dreadthorn’s protectors and sentinels. This level of the tower is less a living space and more a terrifying stronghold for these winged guardians, who watch over the tower and castle with unwavering vigilance.
Description:
The Gargoyle Lair is a vast, open chamber with towering, arched ceilings and thick stone walls that seem to press in on those who enter. The room is dimly lit by faint beams of moonlight that filter in through small, barred windows, casting eerie shadows across the floor. The walls are adorned with ancient carvings and grotesque stone faces, blending in with the unmoving forms of the gargoyles. Large stone pillars support the ceiling, and several gargoyles perch upon them, perfectly still until called to action.
The air in the room is cold and damp, with the constant sound of dripping water echoing through the stone chamber. The floor is uneven and cracked, littered with small pieces of rubble and debris. The room has a musty, earthy smell, as though it has not been disturbed in centuries. At the far end of the chamber is a large, jagged hole in the wall, leading to a stone balcony where the gargoyles can take flight and patrol the skies around Castle Dreadthorn.
Notable Features:
The Balcony:
A large opening at the far end of the room leads to a stone balcony that overlooks the Verminwood Marshes below. The gargoyles use this balcony as a launching point for their patrols around the castle. The view from the balcony is unsettling—swirling mist covers the marshes, and the faint shapes of dark creatures can sometimes be seen moving below. The balcony is partially crumbled, making it treacherous to those unfamiliar with its layout.
Perches and Stone Platforms:
The walls and pillars of the chamber are covered in small ledges and stone platforms where the gargoyles rest. These perches are scattered throughout the room at varying heights, allowing the gargoyles to leap into the air and glide down upon intruders. The platforms are worn smooth from centuries of use, and the stone is cold to the touch.
Gargoyles x 5:
- Armor Class 5
- Hit points 32, 30, 28, 25, 24
- Attacks 4
- Damage 1-3/1-3/1-6/1-4
Gargoyle Nests:
In several corners of the room, crude nests made of stone rubble, bones, and bits of metal have been constructed by the gargoyles. These nests serve as resting places for the creatures when they are not on patrol. The bones scattered throughout the nests hint at the grisly fate of previous intruders or enemies of Dreadthorn.
- 150 gp scattered about the floor
- 250 sp scattered about the floor
- Ring of Fire Resistance loose on the floor
- Scroll of Protection from undead on the floor
- Assorted bits of armor and weapons.
The Stone Throne:
At the center of the room sits a massive stone throne, carved from the very rock of the tower itself. The throne is where the leader of the gargoyles, a massive and ancient creature named Krathor, presides. The throne is adorned with jagged spikes and the remains of broken weapons, trophies from fallen adventurers. When not in flight, Krathor perches here, watching over the lair with glowing red eyes.
Krathor
- Armor Class 5
- Hitpoints: 36
- Attacks 4 (+2 for his age and experience)
- Damage 1-3/1-3/1-6/1-4 (+2 to damage)
Krathor has a bit of his own treasure in his nest to include the following:
- Sleeps on a Cloak of Elvenkind
- 540 gp scattered in his nest
- +1 shield

Third Floor of the Tower: The Vault of Shadows
The third level of Castle Dreadthorn’s Tower is a place of immense secrecy and dark power, known as the Vault of Shadows. This is where Vladimir Dreadthorn keeps his most prized possession, the Stone of Bloodsight, a powerful artifact that he uses to communicate with other vampire covens and gaze into distant realms. The room is heavily warded and protected by both magical and physical defenses, ensuring that only Dreadthorn and his most trusted servants may enter.
The Living Door of the Vault of Shadows
The door to the Vault of Shadows is no ordinary barrier; it is alive, imbued with dark magic by Vladimir Dreadthorn himself. Known as Abyssal Warden, this sentient door is a powerful guardian of the Stone of Bloodsight, capable of detecting intruders, speaking, and unleashing deadly traps upon those who attempt to bypass it without permission. The door’s very existence is tied to the dark rituals Dreadthorn performed during the construction of the Vault of Shadows, ensuring that no one, not even his most trusted servants, can enter without facing its judgment.
The Trap: The Warden’s Challenge
To gain access to the Vault of Shadows and the Stone of Bloodsight, adventurers must interact with the Abyssal Warden. The door does not simply open; it requires those who approach it to pass a test, proving their cunning and resolve.
The Riddle
When the adventurers approach the door, the Abyssal Warden speaks:
“Only those who master both light and dark may pass. Answer me this, and prove you are worthy.”
The door then presents a riddle:
“I am the beginning of eternity,
The end of time and space.
I am essential to creation,
What am I?”
Answer: The letter ‘E’ (The correct answer will allow the adventurers to proceed to the next stage).
The Blood Oath
After successfully navigating the riddle, the Abyssal Warden demands a blood offering. It declares:
“No one enters without a price. To pass, you must offer a drop of your life. Only then will I allow you entry.”
Each adventurer must prick their finger and place a drop of blood on the door’s carved face. However, if the blood is from a creature of pure heart (such as a paladin or cleric), the door reacts violently. The Abyssal Warden is cursed to be eternally resentful of those who follow the path of light, and it attempts to curse the individual, imposing disadvantage on saving throws for the next 24 hours.
If all players offer their blood, the door finally opens, allowing entry to the Vault of Shadows.

Description:
The Vault of Shadows is a circular chamber at the highest secure point of the tower, dimly lit by a cold, eerie blue light that seems to emanate from the walls themselves. The air in the room feels heavy and charged with magical energy, making it difficult to breathe for those unaccustomed to such power. The stone walls are smooth and dark, etched with intricate runes and symbols that glow faintly, hinting at the ancient wards and protection spells that guard the chamber.
At the center of the room, on a raised pedestal made of black marble, rests the Stone of Bloodsight. The pedestal is shaped like twisted vines or thorny tendrils, curling up to hold the stone aloft. The Stone of Bloodsight itself is a perfectly smooth obsidian orb, pulsing with faint red veins of light that twist and writhe beneath its surface. The stone seems to hum with an unnatural energy, and the air around it feels colder than the rest of the room.
The floor beneath the pedestal is marked with an intricate, circular ritual glyph that glows with dark magic. This circle both empowers the stone and protects it from being tampered with. The stone is also connected to a series of thin, dark chains that trail from the pedestal to the walls, anchoring it in place both physically and magically.

Notable Features:
- The Stone of Bloodsight (Centerpiece):
The Stone of Bloodsight is the focal point of the room, glowing faintly with the power of the vampire covens it connects to. The stone is able to project visions and create telepathic links between Dreadthorn and distant allies. The vampires use this stone to communicate with other covens. The stone appears to be alive in some way, as the red veins pulse and shift, reacting to the presence of those nearby. Only Dreadthorn himself can fully access its power. The Shamans would be willing to pay a hefty price for this device. Say, 20,000 gp. But, the Stone of Bloodsight is not so easily given up. Whoever takes possession of it will fall under its curse and refuse to surrender it. No matter what the price. And, once touched by somone other than Dreadthorn, the other covens will know their most prized possession has fallen into enemy hands and will begin a to hunt the offenders down. - Ward of Shadowbinding (Magical Protection):
Surrounding the stone and its pedestal is a series of magical wards and glyphs carved into the stone floor. These wards are designed to prevent anyone from approaching or tampering with the stone without Dreadthorn’s explicit permission. Any attempt to touch the stone without deactivating the wards triggers a surge of necrotic energy that deals 4d10 necrotic damage and paralyzes the intruder for 1 minute. To deactivate the magical wards, an offering of blood must be made to the Stone of Bloodsight. - The Cold Flame Braziers (Light Source):
Four cold iron braziers stand in the corners of the room, burning with ethereal, blue flames that give off no heat. These flames are enchanted to keep the room cold and to ward off intruders with their eerie glow. The cold light casts long, flickering shadows across the room, adding to the sense of unease and mystery. If removed they will not work.
Triumphant Return to Miregrove
After the arduous battle against the vampires of Dreadthorn, the adventurers, weary yet victorious, make their return to the town of Miregrove. As their figures emerge from the thick, misty marshlands, the townsfolk, who had lived in fear of the vampires for years, stand in awe. The once darkened sky over Miregrove seems brighter, the air lighter, as the adventurers walk through the gates.
At the head of the group, the party’s leader holds aloft the shattered remnants of Vladimir Dreadthorn’s personal sigil, a symbol of his reign of terror over the region. Whispers spread quickly among the townspeople as they gather in the central square, where the adventurers are greeted by the town council and the mayor. Banners are raised, and a celebration begins, though beneath the joy, a hint of unease lingers. The adventurers know that the Bloodsight Stone, an ancient relic they recovered during their journey, still holds great power, and there are those who would seek to claim it.

For More Vampire Adventures Watch for the following: (Currently under development)
Module V- 2 Revenge of the Vampires
Module V – 3 Return of the Adventurers.
Now sit back, relax and let your imagination run free…

Donations Always Appreciated; But Never Expected
If you enjoy my work, I could appreciate a tip. It helps to keep the lights on and pay the fine folk at WordPress to keep hosting my site!
$1.00


Leave a Reply